How to Connect Branch Offices with Yeastar Multisite Interconnect

If you have several branches offices and would like to create a centralized enterprise telephone network in an easy and cost-effective way, you will find Yeastar Multisite Interconnect extremely useful.
Yeastar Multisite Interconnect is designed to create links between S-Series VoIP PBXs deployed in different offices and has consummated the Yeastar Branch Office solution. Using Yeastar Multisite Interconnect, you can:
- Make free and direct-dial internal calls between all company extensions across all offices.
- Create a centralized phone system with one easy and sensible dial plan.
- Circumvent the complicity of sip trunking between multiple offices.
The configuration of Yeastar Multisite Interconnect requires the minimum amount of configuration and on-going support. It allows you to designate one “Headquarter” and multiple “Branches Offices”. And to maximize the ease of configuration and management, only one link is required between a branch and the headquarter system to connect the branch to all other offices. That means for a network of one headquarter and 5 branches, only 5 network end-points need to be configured!
In the following instructions, we will introduce how to interconnect the Headquarter PBX and the PBX of “Branch Office A”. If you prefer to learn by video, you can also find the video guide to configure this feature on our Youtube Channel here.
Step 1. Plan and Assign Extensions
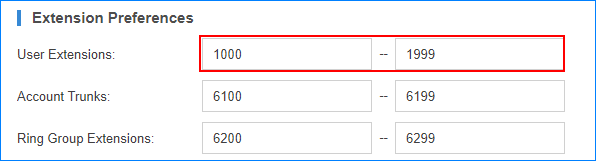
Before you start to connect the Yeastar S-Series VoIP PBX, you need to choose a 3 or 4-digit dial-plan with a unique first digit for each site and configure them on the web interface of each PBX (Settings > PBX > General > Preferences ).
In this example, we assign extensions as below:
- Headquarter PBX: 1XXX (extension number starts with 1)
- Branch Office A PBX: 2XXX (extension number starts with 2)
Step 2. Forward Ports for Headquarter PBX
If the headquarter PBX is behind a router, you need to log in the router and forward ports for the headquarter PBX. Below are the default ports you need to forward:
- SIP Registration Port: UDP 5060
- RTP Ports: UDP 10000-12000
Step 3. Set up Headquarter PBX and Create an Interconnection for Branch Office A
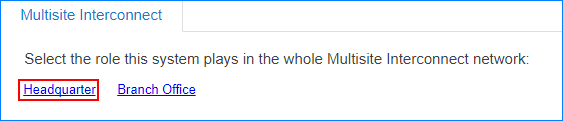
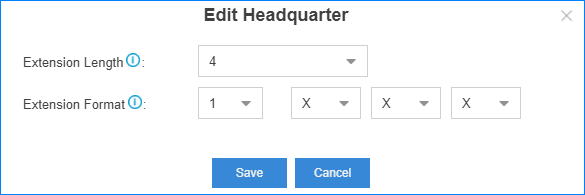
Log in the Web interface of the headquarter PBX, go to Settings > Multisite Interconnect.
a. Set the role of PBX as “Headquarter” and edit the Headquarter according to the extensions length and extension format of this IPPBX.
b. Click ![]() to create an interconnection for “Branch Office A”. Set the name, branch ID, password, extension length and the extension format of the branch office.
to create an interconnection for “Branch Office A”. Set the name, branch ID, password, extension length and the extension format of the branch office.

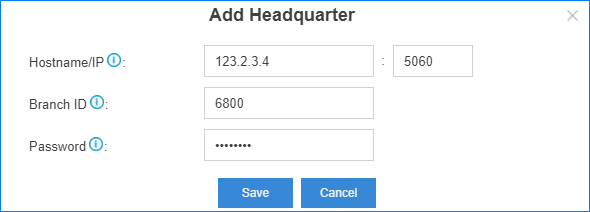
Step 4. Connect Branch PBX and Headquarter PBX
Log in the Web interface of the Branch PBX, go to Settings > Multisite Interconnect.
Set the role of the Branch PBX as “Branch”, and click ![]() to add an interconnection to the headquarter PBX. Enter the IP/domain and SIP port of the headquarter PBX and fill in the branch ID and password that were set on the headquarter PBX for the branch office on Step 3.
to add an interconnection to the headquarter PBX. Enter the IP/domain and SIP port of the headquarter PBX and fill in the branch ID and password that were set on the headquarter PBX for the branch office on Step 3.
Step 5. Check Interconnection Status
If the interconnection status shows,![]() then the branch PBX is connected to the headquarter PBX successfully, and users in the branch office and the Headquarter can make free direct-dial internal calls. For example, Extension 2000 at the Branch Office A can then call Extension 1000 at the Headquarter by just dialing 1000, with no call charges and not extra dialing prefix needed.
then the branch PBX is connected to the headquarter PBX successfully, and users in the branch office and the Headquarter can make free direct-dial internal calls. For example, Extension 2000 at the Branch Office A can then call Extension 1000 at the Headquarter by just dialing 1000, with no call charges and not extra dialing prefix needed.
This blog was originally posted on Yeastar.com